Sunday 31 August 2014

Hand-picked Apple and Blackberry Crumble

Remember those chilly days of your childhood? Those days where the wind howled outside while you sat beneath a blanket, warming up over a crumble your mother or grandma had made? I remember those days fondly, and today I found myself needing some nostalgic comfort. After picking some fruit from the garden and spending a little time in the kitchen, voila, instant childhood happiness in a bowl.

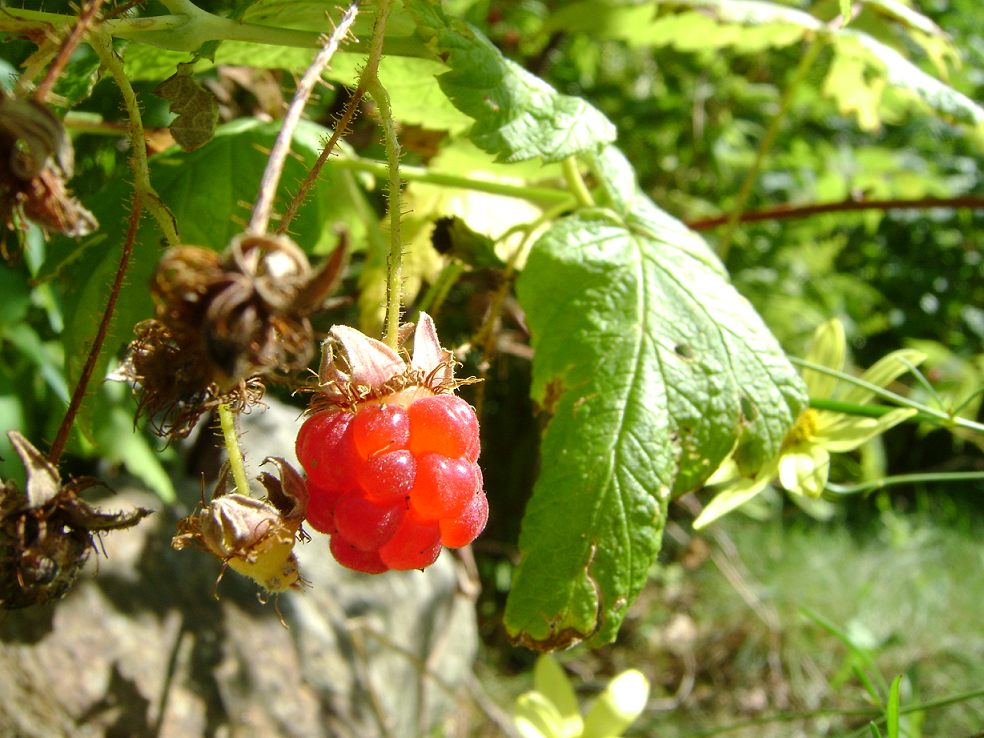
My garden has been positively full to bursting with pears, apples and blackberries, and so I've hand-picked the ripest of the latter two for this recipe. Cooking the apples for a shorter time as per my recipe keeps them from turning mushy (no-one wants to present mushy fruit to their guests now, do they.)

Ingredients

For your crumble

* 60g caster sugar
* 120g plain flour
* 60g unsalted butter at room temperature, cut into pieces

For your compote

* 30g unsalted butter
* 30g demerara sugar
* 300g apples (I'd recommend Braeburn or Bramley)
* 115g blackberries
* 1/4 tablespoon ground cinnamon

1.  Heat up your oven to 190C/170 fan/gas mark 5. Tip the flour and sugar into a large bowl. Add your butter and then use your fingertips to rub it into the flour, creating a light breadcrumb texture. This can take some practice. If you overwork it, the crumble will become heavy and not the light sprinkling from the gods that we're aiming for here. Once you're happy with your handiwork, sprinkle the mixture evenly over a baking sheet and bake for 15 minutes or until lightly coloured.

2. For the compote, peel, core and cut the apples into dices. Add the butter and sugar to a medium saucepan and melt them together over a medium heat. Let this cook for 3 minutes until the mixture turns to a light caramel. You may then stir in your apples and cook for a further three minutes while dancing on your kitchen floor to that song that's playing. Next, stop dancing for a moment to add the blackberries and cinnamon, cooking for 3 minutes more (work that floor again with your socks/stockings.) Remove from the heat after this time has lapsed, cover and leave for 2-3 minutes to continue cooking in the warmth of the pan.

3. Lastly, spoon the warm fruit into an overproof gratin dish, top with the crumble mix, then reheat in the over for 5-10 minutes. Serve with vanilla ice cream or, as is my preference, creamy hot custard.


Friday 11 October 2013

Earl Gray Cupcakes

Everyone knows I love a good cup of tea, so it was inevitable that I'd incorporate some of the good stuff into my cakes. These cupcakes are delightful as an afternoon treat with a cup of tea. Try them and disagree with me. I dare you...

Psssst: Remember to start the frosting whilst the cupcakes are cooking.

Ingredients

* 3 earl gray tea bags
* 140 grams of golden caster sugar
* 120 grams plain flour
* 120 ml of whole milk
* 1 and a half tablespoons of baking powder
* 1 free range large egg
* 40 grams of unsalted butter
* A pinch of salt


Ingredients for the icing


* 500 grams of icing sugar
* 50 ml of whole milk
* 160 grams of unsalted butter
* Food colouring of your choice!


1. Preferably the night before, place the teabags & milk in a saucepan and gently heat to brew the tea. Resist drinking! Ahem. Leave to cool.

2. Preheat your oven to 190°C, Gas 5, and line a 12 bun muffin tin with muffin cases.

3. Using a mixer or spoon, mix the butter, sugar, flour, baking powder and salt gently until you reach the texture of breadcrumbs. Put the eggs in a jug and whisk by hand. 

4.  Say hello again to that tea infused milk and add it to the eggs. Try to squeeze all the milk from the tea bags & set them aside for the frosting.

5. Pour ¾ of the milk mixture into the dry ingredients & mix until smooth & thick. You're getting hungry right about now, arent'cha?

6. Spoon the mixture into the paper cases until ½ full.Don't overfill or those babies will rise too much.

7. Bake in the oven for 18-20 minutes or until risen and springy to the touch. NOM.

8. Leave to cool slightly (always the hardest part!) and then place on a wire rack.

9. While the cupcakes are cooking, place the used tea bags in a small bowl with the milk for the frosting & leave to infuse for 30 minutes.

10. Remove the tea bags and squeeze as much milk out as possible.

11. Using an electric whisk, whisk the icing sugar with the butter until mixed, then pour in the tea infused milk, mixing slowly, then increase the speed to high and whisk until soft & fluffy. Also add your colour of choice at this point if you'd like pretty cuppie cakes.

12. Once your cupcakes are cooled, top them with frosting with a palette knife.

I don't even need to explain step 13...


Friday 18 May 2012

Raspberry & Pine Nut Bars

Easy to make, and perfect for picnics. What's not to like?

Ingredients

* 200g plain flour
* 250g raspberries
* 250g butter, cut into small pieces and softened
* 200g porridge oats
* 175g light muscovado sugar
* Finely grated zest of 1 lemon
* 100g pack pine nuts

1. Preheat your oven to 190 C (fan ovens 170 C). Butter a shallow 9in square tin. Tip the flour, butter and oats into a mixing bowl and work everything together with your fingers. Do this until you have made coarse crumbs.

2. Mix in the sugar, lemon zest and three quarters of the pine puts, still using your hands and then press the mixture together well so it forms large sticky clumps (much nicer than it sounds).

3. Drop about two thirds of the oat mixture into your tin, spread it out and press down very lightly - don't pack it too firmly. Scatter the raspberries on top, sprinkle the rest of the oat mixture over the top and then add the rest of the pine nuts. Press everything down lightly.

4. Bake for 35-40 minutes, until pale golden on top. Cut into 12 bars with a sharp knife while still warm, and then leave to cool in the tin before removing.

Friday 4 May 2012

Victorian Lavender Lemonade


This recipe, popular during the 19th century, was sent to me and I felt it was my duty to share it. Perfect for summer picnics.
Ingredients

*  1 and a half cups of sugar
* 5 cups of water
* 12 stems of fresh lavender (do not use lavender from garden centres!! They may have been treated with pesticides. Only use organic lavender sold as culinary)
* 2 and a quarter cups of lemon juice

1. Boil 2 1/2 cups of water with the sugar.

2. Add the lavender stems and remove the saucepan from heat.

3. Place the lid on and let it cool.

4. When cool, add the remaining 2 1/2 cups of water and the lemon juice.

5. Strain out the lavender.

6. Serve the lavender lemonade with ice, and garnish with lavender blossoms.


Hot Raspberry and Apple Drink (alcoholic)

Don't say I never think of those of you who want something a bit stronger.


Ingredients

* 1litre cider (or apple juice for a non-alcoholic version)
* 30g caster sugar (or simply add to taste)
* 125 ml raspberry juice
* Cinnamon stick


1. Combine the cider (or juice), raspberry juice and sugar in a saucepan, along with 1 cinnamon stick. Stir, stir, stir over a medium heat, until the sugar has dissolved and your concoction starts to simmer. Reduce the heat and allow to simmer for a further 10 minutes.

2. Remove from the heat, then take out the cinnamon stick. Serve warm. Lovely jubbly.

Grandmas Garden Lavender Shortbread

The Victorian language of flowers was known as 'Floriography'. Lavender signified devotion but also distrust, so be careful who you share these with...

I can't make enough of these to keep up with the demand. It's a hard job, but someone has to do it.

The fragrance of lavender drifting around your kitchen will invoke feelings of nostalgia. Be transported to that English country garden you've dreamt about...

Note: With experience comes good judgement of measurements. I like to throw a bit of this there, and a bit of that there, and adjust to taste. Baking is an adventure; play with it and follow your own tastebuds. Don't feel bound to exactly what I say here.

Ingredients

* 350g softened butter
* 125g caster sugar
* 4 tablespoons of icing sugar
* 2 tablespoons of finely chopped fresh lavender
* 325g plain flour

1. Preheat oven to 170 C. In a medium bowl, cream together the butter, caster sugar and icing sugar until light and fluffy.  Add the flour into this mixture until well blended. Be prepared for arm ache if doing manually.

2. I prefer to wait until this point to add my fresh lavender, as I don't like to bash the flowers around too much. Add your 2 tablespoons (that will be more than enough, trust me) and mix in until distributed. Add slightly less for just a hint of lavender, if preferred.

3. Take the dough, bang it onto some lightly floured parchment paper on your work surface, then get those hands dirty; flattening that bad boy to about 2.5cm thick. You may use a rolling pin. The secret (go forth and spread) is not to roll the dough too thinly. Dough too sticky to work with? Add more flour.

4. Cut into shapes with scone or biscuit cutters. My preference is hearts. You want to make them into something else? Be my guest. They do not have to be a perfect, uniform shape. I don't know about you, but part of the charm for me is that home-made look, and those slightly uneven edges...

5. Place onto a baking tray, complete with lightly greased parchment paper. Bake for 18 to 20 minutes in the preheated oven, or just until biscuits begin to brown at the edges. Each and every oven is different, so get acquainted with yours.

6. Cool before eating (although I can rarely follow this advice) and sprinkle with caster sugar.


Seriously Chocolately Molten Cake

This is a wonderful dessert for when entertaining guests. If bowls are not licked/scraped clean afterwards, you're doing it wrong.

Makes three 6-oz ramekin cakes.

Disclaimer: Amanda Gray accepts no liability for damage caused by incessant nagging from friends and family which may arise after the first use of this recipe. 

Use best quality dark chocolate for optimum taste.

* 100g dark chocolate
* 2 eggs (free-range, of course!)
* 20g self-raising flour
* 100g unsalted butter
* 50g caster sugar
* Vanilla icecream / fresh cream (optional for serving)

Directions
1. Melt the dark chocolate and butter. Now, you can use a microwave to do this, or simply melt over a bowl of hot water. Either way works fine (note: do not use direct stove heat or the chocolate will burn,  you know the drill).

2. In a large bowl (tip: I use a large saucepan if I don't have a bowl...The high sides come in handy when stirring), using either an electric whisk or your own hard labour, beat the eggs and sugar till the mixture turns pale and frothy. This will take a few minutes. There's no rush...

3. Pour the melted chocolate & butter you prepared in step 1 into the egg mixture prepared in step 2. Stir in the flour. Mix everything evenly.

4. Grease your ramekins with some butter (otherwise your lovely cakes may well stick when it comes to removing them). Fill the ramekin almost 3/4 full with the chocolate mixture and bake in a preheated oven of 180C for about 10 minutes. If you are using muffin cups, reduce the bake time to about 8 minutes.
The cakes are deliberately slightly undercooked so that they are gooey in the middle, but if you bake them for longer they will still be yummy. Whatever floats your boat.

5. When baked, remove the ramekins from oven and let cool for 1-2 minutes.

6. Serving suggestion:  If you're a fan of decadence, use a sieve to dust icing sugar over the cake. You may also add a scoop of icecream, or a dashing of double/single fresh cream.